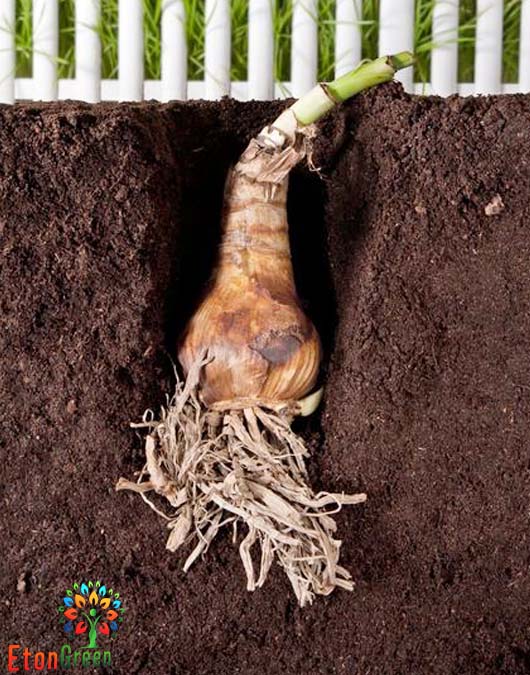
Gloxinia flower bulbs gives you best looking flower for your garden If you do gardening in a proper way so these bulbs give you full year flowers 1 part perlite 1 part vermicomposting 2 part cocopeat and 1 tsp. Antifungals powder you need to mix it properly this is a potting mix for the gloxinia bulbs so mix it and put it in the pot and put some bone meal into the pot set the bulbs over the potting mix and cover the bulbs with some more potting mix and sprinkle water into the pot only for soil moisture these bulbs needs around 30 minute morning sunlight for bloom so set it at the suitable location and water it when you see the soil dry
EtonGreen Gloxinia Tuberous Mixed Color Flower Bulbs (Set of 4 Bulbs)
₹650.00 ₹299.00
- Shipping charge ₹ 90 for entire order
- Did you know that gloxinia can be grown as house plants? True! Gloxinia are fabulous gift plants AND can be spectacular house plants if you give them proper care.
- A few years ago, a gloxinia flowering houseplant (Sinningia speciosa) was considered a perennial. The plants would bloom and then die back. After a period of dormancy, the plant would regrow, delighting its owner with a fresh flush of big, velvety flowers.
- Todays gloxinias are hybrids that are bred to quickly produce a large number of blossoms. These gloxinias produce an outstanding display for about two months, but once the flowers fade, the plant rarely comes back because it invests all its energy into flowers rather than sturdy roots. Therefore, these plants are best grown as annuals, and since they are discarded after the bloom cycle, gloxinia flower care focuses on keeping the plant looking fresh while it is in bloom.
Out of stock
Email when stock available
Weight | 0.5 kg |
---|---|
Dimensions | 10 × 10 × 25 cm |
Up sells product
- Shipping charge ₹ 90 for entire order
- Kaempferia plant blooms the fragrant flowers. Its flower emerges straight from the ground, even before the leaves appear.
- Kaempferia is a stemless plant producing a pseudo stem with 2 to 4 erect leaves from an underground rhizome that has small tuberous roots. Flowering stems are produced from the rhizome when the leaves are not present. Flowers resemble small orchids or African violets but have just three petals.
- Water a plant when the soil feels dry to touch
- Water thoroughly in the summer and reduce watering for the winter & rainy season
- Try to water the plants in the morning around 8-10am
- You should remove dead, infected or damaged plant parts and throw in the garbage collector
- You should fertilize a plant mostly in the spring season, flower bud stage
- Plant season is in monsoon or autumn season
- Plant the bulb 3 inches deep and provide 3 to 4 inches of planting spacing
- The pointy part should face up
- Add some coarse sand or fine gravel to the soil to help improve the drainage Mulch the potting mix with organic material
- Shipping charge ₹ 90 for entire order
- Despite its name, it is not related to the tulip, but to the various ginger species such as turmeric. It can grow as an indoor plant and is also sold as a cut flower.
- Inflorescences, stems, and leaves of this plant resemble the flowers, stems, and leaves of tulips, hence the common name. The true flowers are seen only if they curl around the bracts edges.
- Each inflorescence appears atop a rigid, reed-like stem that grows to 2 inches tall from a clump of narrow, lance-shaped, dark green leaves.
-
Curcuma Planting Procedure:
- Plant rhizomes in spring after last frost date in organically rich, medium moisture, well-drained soils in full sun to part shade
- Plant rhizomes outdoors in spring
- Plant them at a depth of 4 inches
- Plants may also be grown in containers that should be overwintered indoors in the pots in a cool dry location with minimal moisture
-
Caring for Curcuma
- Prepare your planting site, which should be in full sun. Till in a several inches of organic matter, such as peat moss or course sand, to the 12 inches of your planting site to make your soil better suited for drainage. Plant curcumas about one per square foot and bury the bulbs only an inch from the surface of the soil. The eye–or bud–should be facing up .Push down on the soil with your hands to remove any possible air pockets. Water the bulbs and after the water seeps into the soil, push down the soil again.Fertilize curcuma bulbs after planting. Use about one tablespoon of fertilizer labeled 15-15-15 (or 16-16-16 for large curcuma) and a bit less for small varieties
- If your soil tends to dry out much, it’s best to grow Curcuma in partial shade.
- Provide regular moisture throughout the growing season and do not allow soils to dry out.
- Shipping charge ₹ 90 for entire order
- Pick these easy-to-grow varieties for the best blooms. It is a rhizomatous herbaceous perennial plant, evergreen where rainfall and temperatures are adequate.
- It has large clumps of broad, arrow shaped dark green leaves up to 45 cm long.
- The inflorescences are large and are produced in spring, summer and autumn, with a pure white spathe up to 25 cm and a yellow spadix. The spadix produces a faint, sweet fragrance.
- Dig up the rhizomes in autumn, usually after the first frost and store for winter.
- Dig a hole about three times as deep as the height of the bulb.
- Set the bulb in the hole, pointy end up, then cover with soil and press firmly
- Space bulbs 8 to 10 inches apart
- Water thoroughly after planting
- Use the potting mix for bulb plantation as Garden soil + Compost + Perlite + Sand (2:2:1:1) Soil + Cocopeat + vermicomposting (2:1:2)
- Keep them adequately fertilized and watered, misting the plant every so often to keep the ambient humidity high
- They are susceptible to aphids so, take a look closely and apply insecticide.
Related products
- Shipping charge ₹ 90 for entire order
- These plants are perennial herbaceous bulbous plants. They generally have large fleshy bulbs. It is a plant with strap-shaped, glossy, green leaves and producing few large funnel-shaped flowers on a stout stalk, from March-May This plant is very suitable for planting in border, shrubbery and in a pot.
- The amaryllis lily is mainly used for ornamental purpose in garden, terrace, balcony, patio, etc.
- Common name: Hippeastrum
Color: The usual color is white with crimson veins, but pink or purple also occur naturally.
Bloom time: Late December until the end of June.
Height: 24 in/60 cm.
Difficulty level: EasyPlanting & Care
Amaryllis like their soil rich, but exceptionally well-drained, so ideally create a mix from one part well-rotted manure, one part horticultural grit or sand, and two parts leaf mould. Two-thirds good compost mixed with one-third grit also does fine.Sunlight: Full sunSoil: Well-drained soil.
Water: Keep soil moist throughout the growing season.
Temperature: 20°C
Fertilizer: Apply any organic fertilizer.
Harvesting: After the amaryllis has stopped flowering, it can be made to flower again. Cut the old flowers from the stem after flowering, and when the stem starts to sag, cut it back to the top of the bulb. Continue to water and fertilize as normal all summer, or for at least 5-6 months, allowing the leaves to fully develop and grow. When the leaves begin to yellow, which normally occurs in the early fall, cut the leaves back to about 2 inches from the top of the bulb and remove the bulb from the soil. Clean the bulb and place it in a cool (40-50 deg. F), dark place such as the crisper of your refrigerator for a minimum of 6 weeks. Caution: Do not store amaryllis bulbs in a refrigerator that contains apples, this will sterilize the bulbs. Store the bulbs for a minimum of 6 weeks.
Care:
- Once the plant is flowering, continue the watering and keep it out of direct sunlight, and slightly cooler (10-15°C), but as light as possible to promote a longer flower life.
- Each individual flower should last two or even three weeks before they brown.
- As each one fades, cut it off at the top of the stalk and then when the whole stalk is over and begins to sag, carefully cut it off just above the bulb nose.
- After flowering you can keep them from one year to the next.
- Feeding needs to continue and you want to water too, until the leaves begin to yellow in late summer/early autumn.
- At this stage, cut the leaves back to about 6cm (2½in) from the top of the bulb and remove it from the pot.
- Keep the bulb cool (5-10°C) and dark, to give it a dormant period for 8 weeks before you can encourage it to come into leaf and flower again When the temperature in your greenhouse falls to below 10C, bring them into the warmth and begin gentle watering again and your bulb will re-shoot.
- Don t re-pot it for the first couple of years; it hates root disturbance.
- The older and bigger the bulb, the more flowering stems you’ll get, so it’s worth the trouble of nurturing these mini football bulbs.
- Bulbs older than two years will produce offset bulblets.
- These may be left attached to the mother and re-potted with her, creating an amazing show, but its best to remove them carefully just before you replant and put them in their own individual pots.
- These little bulbs will take two years before producing their first flower, but it will be a proud moment when they do.
- Shipping charge ₹ 90 for entire order
- While they’re best known as supremely long-lasting cut flowers, Calla Lilies also make fantastic container and landscape plants! Speckled foliage and gorgeous blooms add a touch of elegance wherever they go, and despite their graceful appearance, they’re remarkably easy to grow!
- calla lily is a favored for its beautiful, showy flowers Height ranges from 3 feet.
- For container planting, select a container with adequate drainage holes and fill it with good quality, well-draining soil. Almost any commercially available potting mix will do the trick.
- For outdoor landscape planting, select a spot with well-drained soil where your Calla Lilies will receive filtered light or moderate shade.
- Dig holes and plant the tubers shallowly (no more than 4” deep) with the eyes facing upwards and the tops barely covered with soil or even slightly exposed.
- Water thoroughly after planting, gently soaking the soil to settle it around the tubers.
-
Calla Lily Tips & Tricks
- Snip a few flowers for bouquets or other cut arrangements while in bloom. Doing so will not hurt your plants and having graceful, long-lasting blooms to bring indoors is one of the best reasons to grow Callas.
- Expect roots and top sprouts to form in the fall in warmer regions, with flowers emerging in the spring and summer.
- Amend poorly draining soil with organic material to raise the level 2–3″ and improve drainage as Callas will not thrive in waterlogged soil. Compost, finely ground bark, or composted manure all work a charm and are widely available.
- Examine your tubers and discern where the growing points, or “eyes,” are located. They should be planted with the eyes facing upwards.
- Shipping charge ₹ 90 for entire order
- Eucharis lily (Eucharis x grandiflora) is a graceful bulb that produces fragrant white flowers similar in shape to daffodils. It is native to South America which explains it’s other common name – the Amazon lily.
- A bulbous Amazon lily is a low growing bulb producing star-shaped clusters of white flower.
- Eucharis is a perennial with a bulb 2 to 6 cm in diameter. The stalked leaves are 20 to 55 cm long and 10 to 20 cm broad. Flowers are large, sweet-scented.
- It likes shade and sheltered areas and makes an excellent potted plant
- It can be planted in the garden
- Plant them with their necks slightly above the soil surface
- Plant in a normal potting compost and plant at 3 to 4 cm
- Propagations by offsets can be done in the spring
-
Sunlight Bright light, partial shade Watering Medium Soil Sandy loam soil, well-drained soil Temperature 15 to 30 degrees C Fertilizer Use any organic fertilizer Harvest Season Spring (Flower & Bulb)
- Shipping charge ₹ 90 for entire order
- Achimenes mexicana is a beautiful and easy member of the Gesneriad family that grows from curious elongated scaly rhizomes.
- It has gorgeous blue-purple flowers with a white throat. They are funnel-shaped and the colour is quite hard to capture photographically as in different lights they appear to oscillate between purple-blue and blue-purple.
- It should come as no surprise that this variety is a favorite among many for its high bloom count and solid, rich coloring. An excellent partner for white tuberous Begonias, these two create a gloriously contrasting display. Provide these easy growers with protection from the sun and regular water during active growth, and they’ll return the favor with months of bright blooms! Enjoy!
EtonGreen Football Lily Pink Flower Bulbs (Set of 5)
- Shipping charge ₹ 90 for entire order
- Scadoxus multiflorus is the scientific name of football lily. This perennial grows from a rhizomatous bulb. It has a false stem as leaves are wrapped together. Leaves may appear after flowering or with them. A false stem can grow up to 60 cm.
- Football lily Bulb This name is a synonym of Scadoxus multiflorus (Martyn) Raf. Each plant will produce only one flowerhead in a season. Blood lily is a bulbous plant with leaves on short, speckled stalks. The flower stalk bears a rounded inflorescence, 8-12 cm across. The plant may live for many years and will flower annually indoors.
- Common Name- Football lily, blood lily, ball lily, blood flower, Katherine-wheel, oxtongue lily, poison root and powderpuff lily
- Scientific Name- Scadoxus multiflorus
- Watering- Medium
-
Caring for Haemanthus Multiflorus
- Pruning is generally not required, just remove the spent flowers.
- Bulbs may be planted outdoors directly in the garden in spring after last frost date.
- Reduce moisture in the winter season.
- Shipping charge ₹ 90 for entire order
- Crinum lilies are large, heat and moisture loving plants, producing an abundant array of showy flowers in summer.
- Lilly like their soil rich, but exceptionally well-drained, so ideally create a mix from one part well-rotted manure, one part horticultural grit or sand, and two parts leaf mould. Two-thirds good compost mixed with one-third grit also does fine.
-
Crinum Planting Procedure:
- Each bulb needs to be planted right side up
- The more pointed end is considered the top
- Plant each bulb in a hole that is just deep enough that its neck is protruding from the soil and the bottom of the bulb is covered in soil
- Covering the entire bulb with soil and planting too deep discourages flowering
- Space bulbs at least 8 inches apart and water the planting site or container well after planting
- Plant the bulb, or place the potted bulb in a warm place with direct light since heat is necessary for the development of the stems.
Reviews
There are no reviews yet.